
How to Create Custom Maps with Markers and Polygons in Allinmap
Allinmap lets you build custom maps with both markers and polygons from the same mobile workflow. You can start with a simple marker-only map, or switch on polygons to map stages, food courts, expo zones, entrances, or any other area that needs a visible boundary.
This guide follows the current app flow used in the frontend, so the steps below match what you see in the product today.
1. Start a new custom map
- Sign in to your Allinmap account.
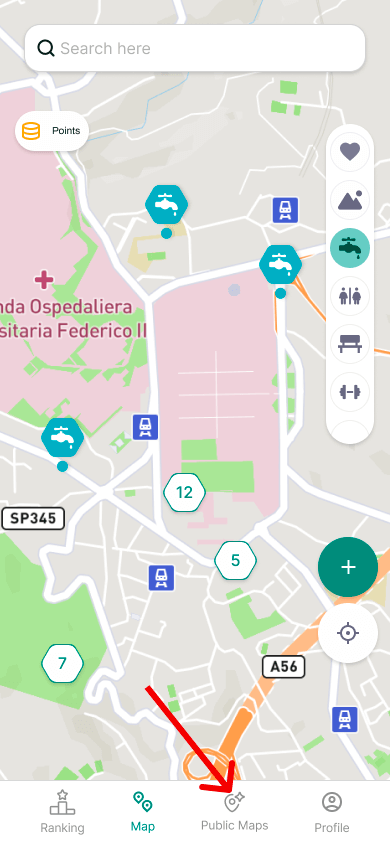
- Open Public Maps / My Maps.
- Tap the floating + button to open the map creation flow.
2. Fill in the map setup
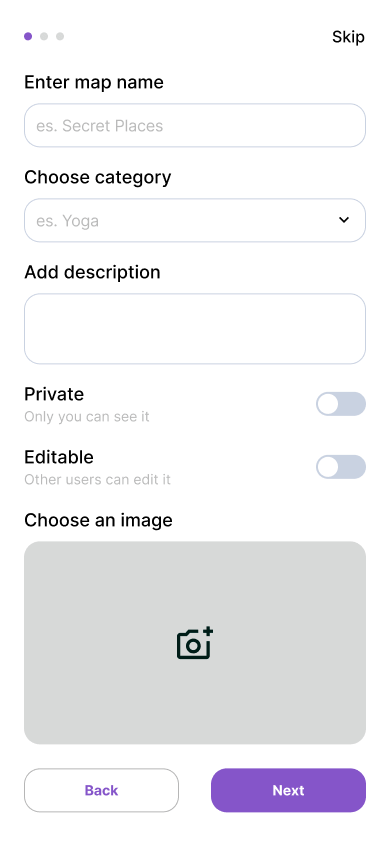
The first step is the map configuration screen. Here you define the structure of the map before adding any content.
- Map name: required
- Category: useful for organizing public maps
- Privacy: choose whether the map is public or private
- Invited users: if the map is private, you can select specific people
- Map type: choose between markers only or markers + polygons
- More settings:
- collaborative editing
- description
- start and end dates for scheduled maps or events
- external link for extra event or venue information
When should you enable polygons?
Turn on markers + polygons when your map needs visible areas, not just points.
Examples:
- a festival map with stages, camping areas, and food courts
- a conference venue with sponsor zones and session rooms
- a trade fair with exhibition halls and service areas
- a travel plan with neighborhoods or park sections
If you only need pins, keep the map in markers only mode for the fastest setup.
3. Create your marker templates first
The next step is the marker template list. Every custom map needs at least one marker type before it can be saved.
Tap Add marker and define the templates you want to reuse across the map:
- Name
- Icon
- Color
- Optional description
- Custom properties
Custom properties are what make a template really useful. For example:
- Booth: brand name, hall, website, promo code
- Food stand: cuisine, opening hours, vegetarian options
- Info point: staffed hours, phone number
- Photo spot: best time, accessibility, notes
You can also edit or remove templates before publishing the map.
4. Draw polygons for zones and areas
If you enabled polygons in the first step, the marker template screen ends with Draw polygons.
That polygon step supports the full zone workflow:
- Add one or more floors if the venue has multiple levels.
- Tap Start drawing.
- Tap the map to place vertices.
- Use at least 3 points to complete the shape.
- Choose which marker type the polygon belongs to.
- Set or adjust the polygon color.
- Optionally add a name, description, and floor.
- Save the polygon and repeat for other areas.
- Save the full map when you are done.
Polygons reuse your marker types, which keeps the legend consistent between pins and areas.
Floors are especially useful for indoor events
In polygon mode, you can create floors before saving the map. This is useful for:
- exhibition centers
- convention halls
- multi-story cultural venues
- stations or large indoor complexes
Later, when users add markers to the map, they can also assign those pins to a specific floor.
5. Add markers on the live map
After the map is saved, open it and start placing pins.
There are two ways to add a marker:
- Long press directly on the map
- Tap the Add marker button
The marker flow in the app is split into steps:
- select the marker type
- choose the floor when floors are available
- fill in custom properties and description
- upload images
- review the summary and save
This is the point where your marker templates pay off, because every pin already knows which fields it should collect.
6. What people can do on the finished map
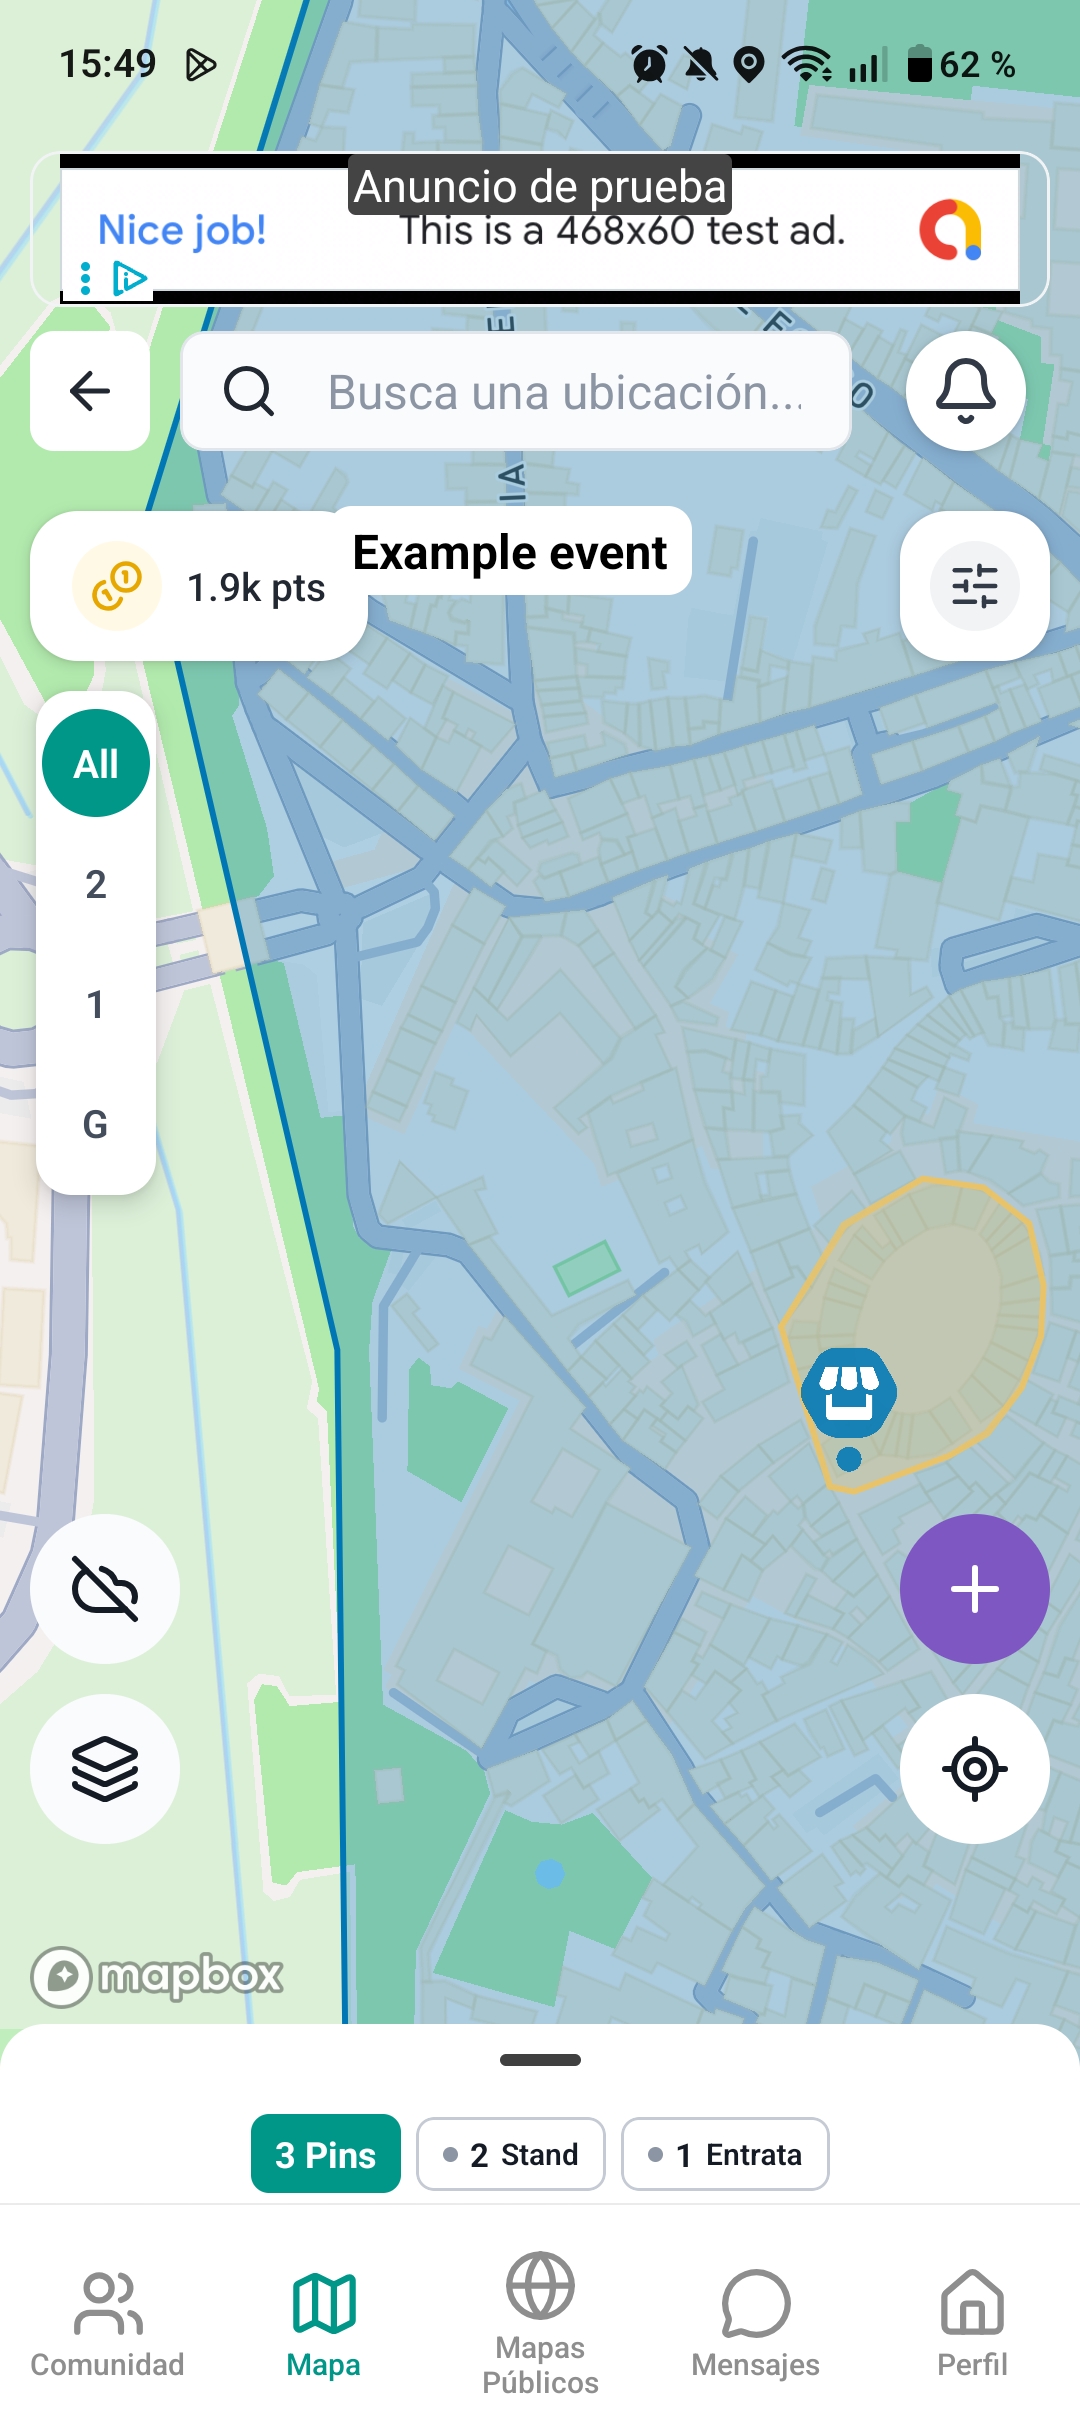
Once the custom map is published:
- markers appear as colored pins with your chosen icons
- polygons render as colored areas with outlines
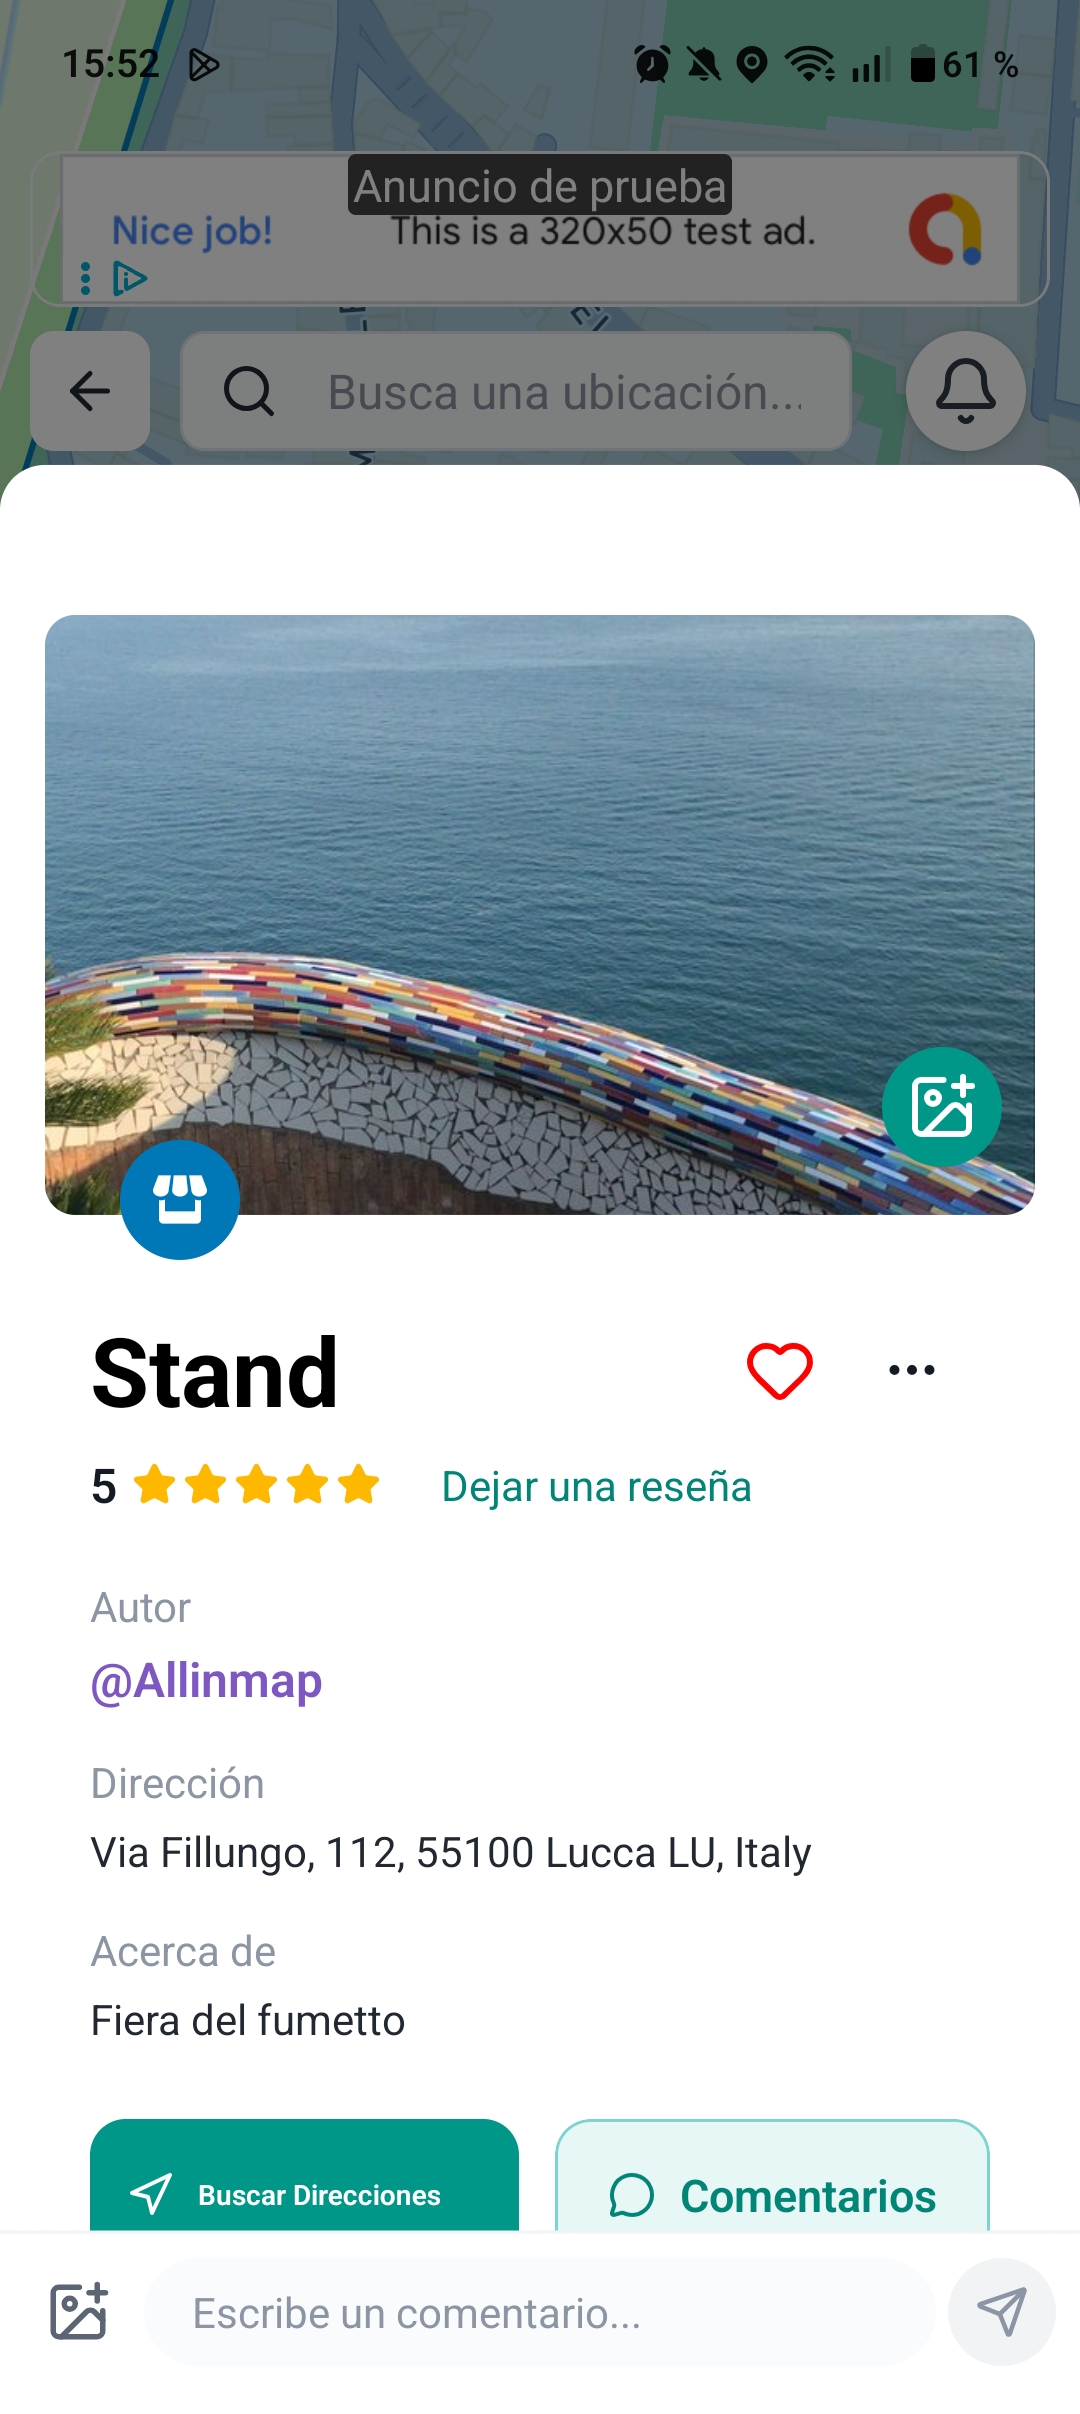
- users can tap a polygon to open its detail card
- markers can include photos, ratings, descriptions, and custom data
- directions can be opened from the map detail flow
This makes custom maps useful for both navigation and context.
7. Best practices for cleaner maps
To keep a custom map easy to read:
- use a small set of clear marker types
- give each type a distinct color
- reserve polygons for zones and large areas
- use markers for entrances, stands, restrooms, desks, or points of interest
- add floors only when the venue truly needs them
- keep names short and move detail into descriptions or custom properties
8. Edit the map later
You can return to your custom map from My Maps and edit it later. From there you can update:
- map settings
- marker templates
- privacy and collaboration
- scheduling details
That makes the workflow suitable for both one-off travel maps and event maps that evolve over time.
Build your first marker-and-polygon map
If you need a custom map for an event, venue, trip, or local guide, Allinmap gives you a practical structure:
- create the map
- define marker templates
- draw polygons if needed
- add markers from the live map
- share the result